Last Updated: 06 Dec 2025
I still remember the day I started my email marketing journey.
Everywhere I looked, people were recommending Mailchimp.
“Use Mailchimp… it’s the easiest tool for beginners!”
“Mailchimp is perfect if you’re just getting started!”
And honestly, I believed them.
But the moment I signed up and landed inside that dashboard…
I felt completely lost.
There were too many buttons… too many options… and nothing felt “beginner-friendly.”
Instead of sending my first email, I spent hours just trying to understand where everything was.
So I did what every confused beginner does —
I read hundreds of Mailchimp tutorials.
But most of them were either outdated, too advanced, or explained everything in a way that made Mailchimp feel even more complicated.
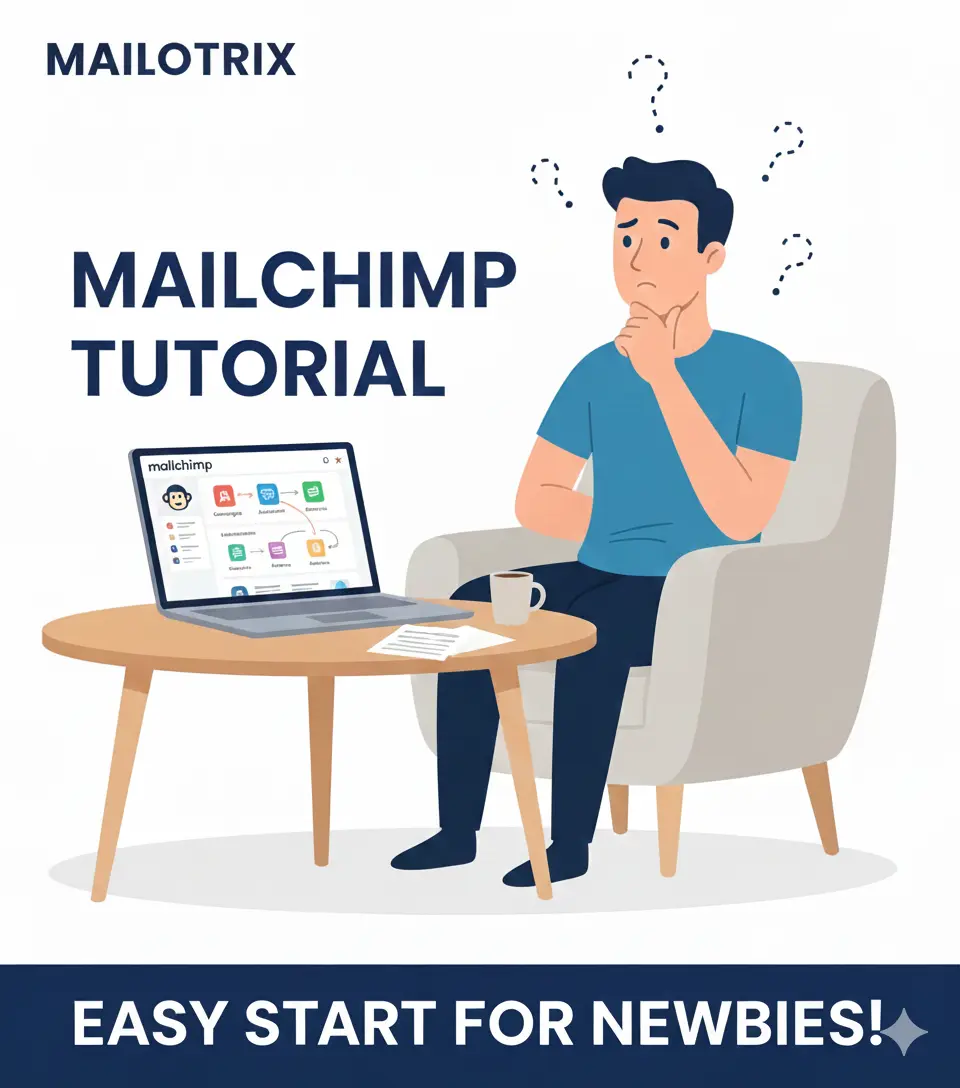
That’s exactly why I created this guide.
This is the Mailchimp tutorial I wish I had on my first day — simple, clear, and made for absolute beginners.
If you’re opening Mailchimp for the first time and feeling the same confusion I felt… don’t worry.
By the end of this tutorial, you’ll know exactly how to set up your account, create your audience, design your first email, and automate everything step by step.
Let’s start your Mailchimp journey the easy way.
Table of Contents
ToggleMailchimp tutorial – Understanding the Mailchimp Dashboard
When you log into Mailchimp for the first time, it feels like walking into a room full of buttons you’re scared to touch.
I’ve been there — I clicked one thing and suddenly I was in a completely different part of the platform.
So instead of confusing you with too much technical talk, let me give you a simple, friendly tour of the dashboard.
Imagine I’m sitting next to you, showing you what each button actually does and why (or if) you should care about it as a beginner.
The Left Sidebar — Your Main Control Panel
This sidebar on the left is basically the heart of Mailchimp.
Everything you’ll ever do starts from here.
Let’s break it down
Create (Your “Start Something New” Button)
Whenever you want to create anything new — an email, form, landing page, automation — you start here.
You’ll see options like:
Email → for regular newsletters or automated emails
Customer Journey → for multi-step automations
Signup Form → to collect emails
Landing Page → to promote an offer
Social Post → schedule posts
Ad → Facebook, Instagram, or Google retargeting
Postcard → yes, Mailchimp even lets you send physical postcards
As a beginner, you’ll mostly use:
👉 Email, Signup Form, and sometimes Landing Pages
Audience (Your Subscriber List)
Everything related to the people on your list is inside this tab.
Here’s what you’ll find inside:
All Contacts – your full list
Tags – labels to organize people (example: “customers”, “new leads”)
Segments – smart groups based on behavior (example: “opened last 3 emails”)
Signup Forms – form builder, pop-ups, embedded forms
Surveys – to collect feedback
Inbox – shows messages if someone replies to your campaigns
Settings – behind-the-scenes stuff like required footer info, merge fields
As a beginner, the main things you’ll use are:
👉 All Contacts, Tags, Signup Forms
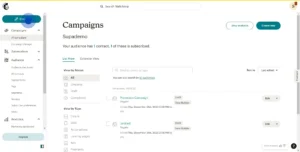
Campaigns (All Your Emails in One Place)
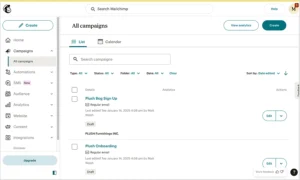
Think of this as your “email history + drafts” folder.
Inside Campaigns, you can:
See all your drafted emails
View everything you’ve sent
Check scheduled emails
Duplicate old campaigns
Edit templates
You’ll come here often.
Automations / Customer Journeys
This is where you set up automated workflows.
For example:
Welcome email when someone signs up
Follow-up email after 2 days
Special email when a tag is added
If you’re using Mailchimp’s free plan, you’ll mostly use simple one-step automations.
Content Studio (Your Image & File Library)
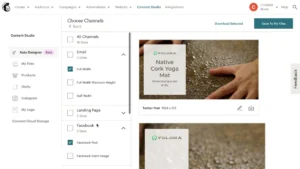
This is where Mailchimp stores all the images, logos, and files you upload.
Inside you’ll see:
My files – your actual images
My logo – your saved brand logo
Products – if you connect an e-commerce store
Giphy – built-in GIF library
Integrations like Canva – makes design easier
Any time you upload an image in an email template, it’s saved here.
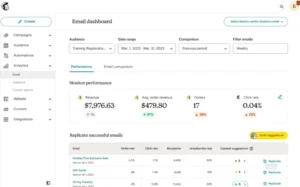
Reports
Your analytics live here.
Mailchimp will show:
Open rates
Click rates
Unsubscribes
Bounce rates
Revenue (if you run an e-commerce store)
Landing page stats
Ad performance
Automation performance
This section tells you what’s working… and what’s not.
Setting Up Your Domain in Mailchimp
Before you send any emails, you need to verify your domain and set up your email authentication.
This step is extremely important because it helps your emails land in the inbox instead of the spam folder.
Mailchimp uses two main authentication methods:
DKIM (DomainKeys Identified Mail)
SPF (Sender Policy Framework)
When these are set up correctly, email providers like Gmail, Outlook, and Yahoo can trust that you’re a real sender — not a spammer.
Let’s walk through the steps.
1. Verify Your Domain
Mailchimp requires you to verify the domain you’ll use to send emails.
This proves that you actually own the domain and helps improve deliverability.
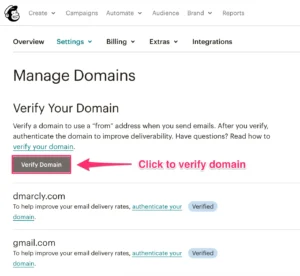
Here’s how to verify it:
Click your profile icon in the top-right corner.
Select Account and Billing.
Go to Settings → Domains.
Click Verify a Domain.
Enter the email address you want to use for sending emails.
Mailchimp will send a verification code to that email.
Open the email → copy the code → return to Mailchimp and paste it.
Once the code is accepted, your domain is officially verified.
2. Set Up DKIM and SPF
After verifying your domain, the next step is enabling DKIM and SPF for proper email authentication.
Start Authentication
On the same Domains page, click Start Authentication next to your verified domain.
Add SPF Record
To configure SPF, you need to go to your domain registrar (like GoDaddy, Namecheap, Hostinger, Bluehost, etc.) and update DNS settings.
You’ll usually add a TXT record with Mailchimp’s SPF values.
Mailchimp will show the exact record you need to add.
This tells email providers that Mailchimp is allowed to send emails using your domain name.
Add DKIM Record
Mailchimp will also give you DKIM records.
These are usually two CNAME records.
Copy them exactly as shown and add them to your DNS.
Once saved, DNS changes may take a few minutes to a few hours to update.
Authenticate in Mailchimp
After adding SPF and DKIM to your DNS:
Return to Mailchimp.
Click Authenticate.
Mailchimp will check if the records are correct.
When everything is done properly, Mailchimp will mark them as Authenticated.
3. Test Your Setup
Once DKIM and SPF are active, it’s smart to run a quick test.
Step 1: Send a Test Email
Open any campaign and click Send a Test Email.
Step 2: Check Email Headers
If you’re using Gmail:
Open the email
Click the three dots
Click Show original
Step 3: Look for PASS
You should see PASS next to:
SPF
DKIM
DMARC
If everything shows PASS, it means your authentication is perfect.
Setting up your domain with SPF and DKIM is one of the most important steps in email marketing.
It prevents your emails from being flagged as spam, increases trust with inbox providers, and improves your open rates right from the beginning.
How to Set Up Your Audience (Your Email List)
Alright, now that you understand the dashboard, it’s time to set up the heart of your email marketing — your audience.
In Mailchimp, your “Audience” simply means your email list (your subscribers, leads, customers… basically the people you’ll be emailing).
1. Create Your First Audience
Mailchimp automatically creates one default audience for new accounts.
But you can rename it to match your brand.
Here’s how:
Go to Audience → Audience Dashboard
Click Manage Audience → Settings
Choose Audience name and defaults
Rename it to something simple like “Main Newsletter List” or “[Brand] Subscribers”
This will help you stay organized in the long run.
2. Import Contacts (CSV, Manual, From Your Website)
If you already have subscribers collected somewhere else (like Notion, Google Sheets, Excel, or another email tool), you can move them to Mailchimp.
You get three easy ways:
a) Import via CSV (most common)
Just export your list from wherever it currently is → upload it here:
Audience → All Contacts → Add Contacts → Import Contacts
Mailchimp will ask you to match each column (name, email, tag, etc.) — very straightforward.
b) Add Contacts Manually
If you only have a handful of emails, use:
Add a Subscriber
and type the details in.
(But make sure they actually gave you permission. No random adding!)
c) Import From Your Website
If you’re collecting emails through your website:
Use Mailchimp’s Signup Forms
Or connect your site with a plugin (WordPress, Shopify, etc.)
Whenever someone opts in, they’ll automatically land inside your audience.
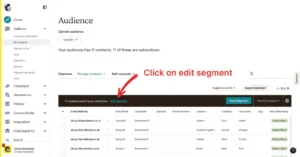
3. Create Tags & Segments
Now this part is where beginners usually go wrong — they dump all subscribers in one place and have zero organization.
Tags and segments keep things clean.
Tags = labels
Examples:
“Customers”
“Leads”
“Freebie Downloaded”
“High-Value Prospect”
Tags help you quickly identify who is who.
Add them while importing, or apply them later inside contact profiles.
Segments = smart groups
Segments automatically group people based on behavior or data.
For example:
People who opened your last 3 emails
Subscribers from India
Contacts with the “Customer” tag
People who clicked a specific link
Mailchimp keeps these segments updated automatically.
Segments = targeted emailing
Tags = manual labeling
How to Create Signup Forms in Mailchimp
Now that your audience is ready, the next step is getting people into that audience.
And that happens through signup forms.
Mailchimp gives you a few different types of forms, and honestly, when I started, I didn’t even know which one to use or where to find everything.
So let’s break it down the easy way.
1. Embedded Form (For Websites & Blogs)
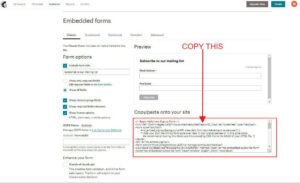
If you have a website or blog, this is the form you’ll use the most.
An embedded form is simply a small subscription box you paste anywhere on your website—sidebar, footer, inside blog posts, or landing pages.
How to create it:
Go to Audience → Signup Forms
Select Embedded Forms
Customize style (classic, condensed, minimal, etc.)
Copy the code Mailchimp gives you
Paste it into your website’s HTML or a widget area
If you’re using WordPress, paste it into a Custom HTML block.
This form is perfect for growing your list passively through your normal content.
2. Pop-Up Form
Pop-up forms are a bit aggressive, but they work extremely well when used smartly.
Mailchimp lets you design a pop-up that:
Appears after a few seconds
Shows when someone scrolls
Or shows when someone tries to exit your site (exit intent)
How to create it:
Audience → Signup Forms
Choose Subscriber Pop-Up
Customize layout, image, colors, message
Publish it
Add the provided script to your website
Pop-ups usually get more signups than embedded forms because they grab attention instantly.
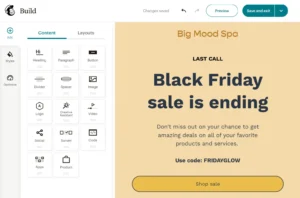
3. Landing Page Form (Dedicated Opt-in Page)
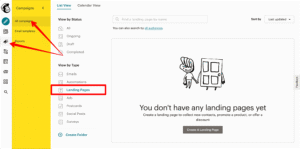
If you want a clean, distraction-free page to promote a freebie, discount, or newsletter, use Mailchimp’s landing pages.
A landing page form works perfect for:
Lead magnets
Free email courses
Waitlists
Event registrations
How to create it:
Click Create
Choose Landing Page
Pick a template
Add your headline, image, and form
Connect the page to your audience
Publish and share the link anywhere
This is great when you don’t have a website yet—or when you want a focused, high-conversion page.
How to Create Your First Email Campaign
Alright, now comes the exciting part:
sending your first email.
If this is your very first time inside Mailchimp, don’t worry—creating a campaign looks complicated at first, but once you understand the flow, it becomes super easy.
Let’s break it down step by step.
Step-by-Step: Creating Your First Email
Step 1: Click “Create” → Email
You’ll see a few options.
Choose Regular Email.
Give your campaign a name.
(Don’t overthink it; this name is just for you, not subscribers.)
Adding Recipients
This is where you choose who will receive your email.
Select your Audience
(Optional) Choose a Segment if you only want certain people (like “Blog Readers” or “New Subscribers”)
(Optional) Add Personalization like First Name
If you’re just starting, simply select your entire audience.
Email Settings You Should NOT Ignore
Before you hit send, Mailchimp asks you to confirm a few settings. Don’t skip these:
1. From Name and Email
Use a real name + branded email.
Example:
Kartik from mailotrix.com
Avoid using only your business name; it feels cold.
2. Tracking Settings
Keep these ON:
✔ Open tracking
✔ Click tracking
✔ Google Analytics (if connected)
These help you understand how people engage with your emails.
4. Schedule or Send
You can either:
Send Now, or
Schedule (best for high open rates)
Most email marketers prefer morning times, but you can test what works for your audience.
How to Use Mailchimp Email Editor (Drag & Drop)
Most beginners get confused the moment they open the Mailchimp email editor.
Trust me… I’ve been there.
Blocks everywhere, buttons everywhere — and you don’t even know where to start.
But the truth is, once you understand the basics, Mailchimp’s editor is actually very easy to use.
Think of it like building with Lego pieces… just drag, drop, and edit.
Let’s walk through it the simple way.
Choosing a Template
After you click Design Email, Mailchimp will show you a bunch of templates.

Here’s the easy rule:
👉 If you’re a beginner, choose a basic one-column layout.
It’s simple, clean, and works on all devices.
Fancy designs look good but are harder to edit and often reduce deliverability.
You’ll see templates like:
Basic
1 Column
Sell Products
Tell a Story
Make an Announcement
Pick one that matches your email style.
For most people, 1 Column is more than enough.
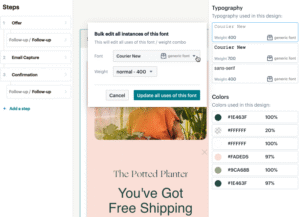
Adding Blocks (Text, Images, Buttons)
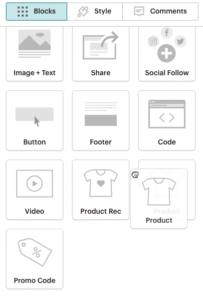
Once you’re inside the editor, everything works through blocks.
On the left side, you’ll see blocks like:
Text
Image
Button
Divider
Social Icons
Logo
Products (if ecommerce)
All you have to do is drag a block from the left → drop it where you want it in the email.
Text Block
Click to edit. Type normally.
You can bold, add links, change colors — everything happens inside the right panel.
Image Block
Drag the block → upload your image → adjust size.
Mailchimp even has a built-in image editor if you need quick fixes.
Button Block
Drag the button block → write your CTA → link it.
Example: “Download Now” or “Read the Full Guide”
Buttons increase clicks and guide your readers clearly.
How to Set Up Your First Automation (Welcome Email)
A welcome email is the first message your subscriber receives after joining your list.
It’s your chance to make a great first impression — and the best part?
Once you set it up, Mailchimp sends it automatically.
No manual work. No scheduling. Pure automation.
Let’s walk through it step by step.
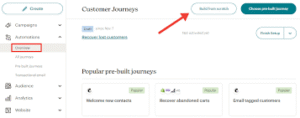
Step 1: Go to Automations → Customer Journeys
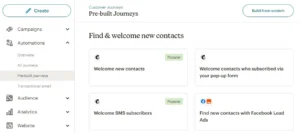
In your Mailchimp dashboard:
Click Automations
Select Customer Journeys
Click Create Journey
Don’t get overwhelmed — we’re keeping it super simple.
Step 2: Choose the Trigger
A trigger tells Mailchimp when to start the automation.
For a welcome email, choose:
👉 “When someone joins your audience”
This means the moment someone fills your form → the welcome email starts automatically.
If you have multiple audiences, select the right one.
Step 3: Add Your Welcome Email
After selecting your trigger:
Click + Add a Journey Point
Choose Send Email
Click Design Email
This opens the same drag-and-drop editor you used earlier.
Step 4: Turn ON Your Automation
Once you’re happy with your email, click:
👉 Start Journey
Mailchimp will now send your welcome email automatically to every new subscriber — 24/7.
Adding a Signup Form to Your Website
No matter what platform you use, Mailchimp offers three main ways to add forms:
1. Embedded Form
Perfect for blog posts, sidebar, footer, or landing pages.
Steps:
Go to Audience → Signup Forms → Embedded Forms
Customize the design
Copy the code
Paste it into your site
2. Pop-Up Form
Great for increasing conversions.
Steps:
Go to Signup Forms → Subscriber Pop-Up
Design your pop-up
Set delay (e.g., after 5 seconds or exit-intent)
Publish it
Mailchimp gives you a small script to paste in your site header
3. Landing Page Form
If your website doesn’t support embedding, this is perfect.
Mailchimp gives you:
A standalone landing page
A hosted URL
A built-in signup form
You don’t need hosting or design skills.
Just share the link anywhere:
Instagram bio
WhatsApp
Facebook groups
Ads
YouTube description
Mailchimp Alternatives
Mailchimp is a great starting point, but it isn’t perfect for everyone. Depending on your goals, other tools might fit better. Here are a few you should know about:
1. MailerLite — Best for Beginners & Newsletter Creators

If you’re new to email marketing or want to run a simple newsletter, MailerLite is the easiest tool to start with.
It has:
A clean, beginner-friendly interface
A simple drag-and-drop editor
Great tools for personal newsletters and small creators
More affordable pricing compared to Mailchimp
For anyone starting their first newsletter, MailerLite feels way less overwhelming.
2. ActiveCampaign — Best for Advanced Users & Automation Lovers

If you want to grow into advanced automation, personalized journeys, deep segmentation, and CRM features, ActiveCampaign is the tool professionals prefer.
It’s great for:
Coaches
Agencies
SaaS companies
Anyone who wants powerful automation
ActiveCampaign is not as beginner-friendly, but once you level up, it gives you far more control and customization than Mailchimp.
3. Omnisend — Best for Ecommerce Stores
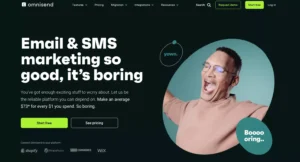
If you run an online store on Shopify, WooCommerce, or BigCommerce, Omnisend is the top choice.
It offers:
Ready-made ecommerce automation (cart abandonment, browse abandonment)
Product recommendation blocks
Ecommerce-focused reporting
SMS + email campaigns
It’s built specifically for ecommerce, so it feels more natural than Mailchimp for store owners.
you can also see my full list of Mailchimp Alternatives I used them personally
Conclusion
As you’ve seen, getting started with Mailchimp isn’t complicated at all. With the right steps, any beginner can set up an audience, create signup forms, design beautiful emails, and start sending campaigns within a few hours.
That said, Mailchimp isn’t perfect for everyone. As your needs grow, you might find some of its features limited or the pricing a bit high for what you’re getting.
If that happens, remember—you do have great alternatives.
MailerLite is perfect for beginners and newsletter creators.
ActiveCampaign is ideal if you need advanced automation and deeper control.
Omnisend is built for ecommerce stores that want powerful revenue-focused marketing.
At the end of the day, the “best” email marketing tool depends on your goals, your audience size, and how advanced your marketing strategy needs to be.
No matter which tool you choose, focus on sending helpful, relevant, and consistent emails. If you stay committed, your email list will grow—and your results will follow.
