Last Updated: 21 Nov 2025
When I first started out, I didn’t take email list building seriously. I was chasing likes and followers on social media, thinking that was enough to grow my business.
But here’s what I discovered the hard way: social platforms don’t pay the bills—email does so, I will teach you How to build an email list in just 9 steps.
Email consistently delivers one of the highest returns in digital marketing—about $36 for every $1 spent. That’s why so many small businesses rely on it: in fact, 81% use email to acquire new customers and 80% use it to keep them coming back.
It’s like having a direct line to your audience that no algorithm can take away. if you want to compare Social media and email marketing you can read it.
But there’s a catch I learned after neglecting my list for a few months. Subscribers disappear—fast. On average, 22.7% of your list goes cold every year, and in B2B,
it can be as high as 70% because professionals change jobs so often. I watched my open rates drop and revenue dip, all because I wasn’t consistently adding fresh leads.
That was my wake-up call. I realized email list building isn’t something you “set and forget.” It’s the lifeline of your business, and if you stop feeding it, it stops feeding you.
In this guide, I’ll share the exact methods I’ve used to build my own email list and my clients’—not theory, but proven, practical strategies I’ve tested over years.
Follow along, and you’ll learn what truly works to grow a list that converts and drives real revenue.
What Makes a High-Quality Email List? (Practical Tips)
✅ Always use double opt-in – Ask people to confirm their email after signup. This makes sure they’re real and genuinely want your emails.
✅ Give value first – Offer a freebie (like an eBook, checklist, or template) that matches your niche. People who sign up for it are already interested in your topic.
✅ Clean your list often – Remove inactive subscribers every few months. A smaller but active list is far better than a huge dead list.
✅ Segment from day one – Add simple tags like “Beginner,” “Advanced,” or “Customer.” Later, you can send the right emails to the right group.
❌ Never buy email lists – They don’t work. The emails are cold, people don’t know you, and it can even get your account banned.
What you get on this page
Step 1: Pick the Right Email Marketing Tool
Step 2: Create a Lead Magnet People Actually Want
Step 3: Add Signup Forms in the Right Places
Step – 4 Create a Dedicated Landing Page
Step 5: Promote Your Signup Link Everywhere
Step 6: Encourage Referrals (Story: How Mailotrix Crushed It)
Step 7: Use Simple Chatbots or Interactive Forms to Capture Emails
Step 8: Collect Emails Offline (QR Codes at Events, Stores)
How to Build an Email List From Scratch (Step-by-Step Guide)
Step 1: Pick the Right Email Marketing Tool
Before you build a list, you need a solid tool. Your email platform is the foundation of everything else you’ll do.
Pick the wrong one, and you’ll waste hours fighting clunky dashboards. Pick the right one, and you’ll be up and running in minutes.
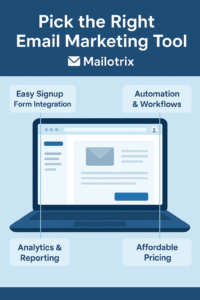
Here’s what actually matters when choosing (forget the shiny features for now):
✅ Free plan to start – Don’t burn cash upfront. Most good tools give you a free tier.
✅ Beginner-friendly – If it takes you 3 hours to make a form, you’ve chosen the wrong tool.
✅ Basic automation – At minimum, you need to send a welcome email automatically.
✅ Inbox delivery – If your emails don’t land in the inbox, none of this matters.
Top free tools worth testing:
MailerLite – Super clean and beginner-friendly. (MailerLite vs Convertkit)
- ConvertKit (Free plan) – Perfect if you’re a creator or coach.
Brevo (Sendinblue) – Great free plan and solid automation.
Activecampaign – If you want to keep things nect level you should give it a chance.
| Tool | Best For | Free Plan | Key Features | Ease of Use | Quick Take |
|---|---|---|---|---|---|
| MailerLite | Beginners | Yes | Clean UI, forms, landing pages | ⭐⭐⭐⭐ | Start here if you’re brand new—super simple. |
| ConvertKit | Creators & Coaches | Yes | Tags, automations, creator-friendly | ⭐⭐⭐⭐ | Best choice for creators, coaches, and bloggers. |
| Brevo | Businesses & SMBs | Yes | Email + SMS, strong automation | ⭐⭐⭐ | Great if you want both email + SMS marketing. |
| ActiveCampaign | Advanced Marketers | Limited | Deep automation, CRM, segmentation | ⭐⭐⭐ | Go here if you need advanced automation + CRM. |
💡 Pro tip: Don’t overthink this step. Your first goal is to start collecting emails today, not find the “perfect” tool. You can always switch later.
Step 2: Create a Lead Magnet People Actually Want
Let’s be real—nobody wakes up thinking, “I want to join another newsletter today.”
If you want people to hand over their email, you need to give them a reason—a quick, useful resource that solves a problem and is directly tied to your business.
That’s your lead magnet.
And here’s the proof it works:
👉 90% of online users are happy to exchange their email for a valuable freebie like a checklist, template, or discount.
👉 Guides and eBooks still convert like crazy—a 2023 study found they average an 83.6% conversion rate.
The best lead magnets share three traits:
✅ Instant value – They solve a real problem fast.
✅ Specific – One clear win, not a 50-page eBook nobody finishes.
✅ Relevant – Attracts the exact kind of person you want on your list.
Proven lead magnet ideas that still crush in 2025:
Checklist – “10-Point Checklist for Writing High-Converting Emails”
Template/Swipe File – “Copy-Paste Cold Email Template That Gets Replies”
Mini-Guide/One-Pager – “How to Double Your Email Opens in 24 Hours”
Discount/Free Trial – Perfect for eCommerce or SaaS
Quiz/Assessment – “Find Out Your Email Marketing Score in 60 Seconds”
Guides & eBooks – Still powerful when short, practical, and well-designed
💡 Pro tip: Your lead magnet should give a quick win, not your whole system. The goal is to make people think: “If the free stuff is this good, the paid stuff must be amazing.”
Quick Start: How to Launch Your Lead Magnet
Pick one problem your audience struggles with.
Create a simple solution (PDF checklist, 1-page template, or discount code).
Upload it to your email tool (so it can auto-send after signup).
Connect it to your signup form or landing page.
Test it yourself—sign up, download, and make sure it works.
That’s it. You now have a lead magnet that attracts the right subscribers, not just anyone with an email address.
Step 3: Add Signup Forms in the Right Places
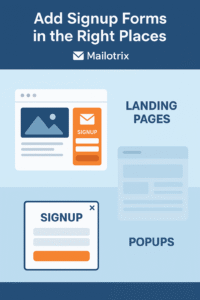
Think of your signup form as the door to your email list. If it’s hidden, nobody’s walking in. If it’s in the right spots, you’ll have a constant flow of new subscribers.
Here’s what the data says, and how to actually implement each form type on your site 👇
1. Use Popups on your site to collect emails
Average conversion of pop ups are 4.65%. Exit-intent popups rescue up to 7% of visitors who were about to leave.
Why it works: Popups are your safety net. When readers are seconds away from bouncing, a well-timed popup says: “Wait—take this free guide/discount before you go.” Annoying? Maybe. Effective? Absolutely.
How to set one up:
In your email tool, select Popup Form.
Set triggers:
Exit-intent (when a user’s mouse heads to close the tab).
Scroll depth (when they’ve read 50% of a post).
Time on page (after 30–60 seconds).
Keep the copy short: “Wait! Don’t leave without your free [lead magnet].”
Always include a clear X to close so it doesn’t annoy people.
💡 Pro Hack: Mobile-specific popups work better than desktop. Always preview both.
2. In-Content Forms (Perfect for Blog Posts)
Conversion rates vary, but when placed after delivering real value, they consistently outperform sidebars and footers.
These forms catch readers at their peak moment of interest. Imagine reading a guide on SEO, and just as you’re hooked, you see: “Want my SEO Checklist? Grab it here.” It feels natural—and irresistible.
How to set one up:
Write a blog post on a topic related to your lead magnet.
Add an inline form (your tool will give you embed code).
Place it:
After a key section (“Want to implement this faster? Grab the free checklist below 👇”).
Or in the middle of a long article as a “content break.”
💡 Pro Hack: Use content upgrades (mini freebies directly tied to that article). Example: In a post about subject lines, offer “50 Proven Subject Lines PDF.”
3. Footer Forms (The Safety Net)
Fotter form usually have lower conversion rates, but often bring in higher-quality leads.
If someone scrolls all the way down to your footer, they’re serious about you. These aren’t random visitors—they’re warm prospects who are likely to convert.
How to set one up:
In WordPress, go to your Footer Widget Area.
Paste your form embed code.
Keep it minimal: headline + name + email + button.
💡 Pro Hack: Add a micro-trust element: “Join 2,300+ subscribers who get weekly email tips.”
Step – 4 Create a Dedicated Landing Page
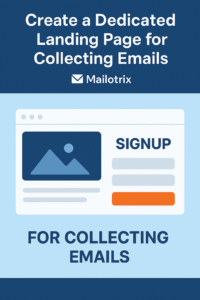
From my own experience, nothing has worked better for collecting emails than a dedicated landing page. Unlike a homepage or a blog sidebar form, a landing page only has one job—to get people to sign up. When I send traffic there, visitors don’t get distracted by menus or other posts. They either join my list or leave, and that simple choice makes a huge difference.
Here’s what I’ve seen (and the numbers back this up too):
On average, signup pages convert around 6.47%.
The top 10% of landing pages get 26%+ conversions.
Even fun, gamified pages like spin-to-win or scratch cards can hit 11%+.
Personally, I’ve noticed that when I keep the page clean with a strong headline, a clear offer (like a free guide or checklist), and a simple call-to-action, my signups jump way higher compared to just relying on a form in the sidebar. If you’re serious about growing your email list, creating a landing page is one of the easiest wins.
What to Include
Clear headline → Promise a result, not just a freebie.
One benefit → “Get my checklist that doubled my open rates.”
Simple form → Name + email only.
Strong CTA → “Send Me the Guide” beats “Submit.”
💡 Pro tip: Don’t stop at one page. Create multiple landing pages tailored to different lead magnets (checklist, webinar, template). The more specific the offer, the higher your conversions.
👉 Think of your landing page as a 24/7 salesperson—working for you while you sleep.
Step 5: Promote Your Signup Link Everywhere
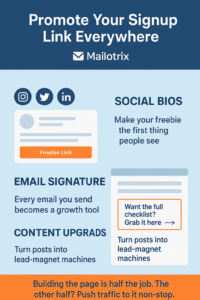
Building the Page is Half the Job—The Other Half is Driving Traffic
Here’s something I learned quickly: just creating a landing page isn’t enough. The real magic happens when you push traffic to it non-stop.
Think about it—if your lead magnet is genuinely valuable, why keep it hidden? I make sure people see mine everywhere possible. Some simple ways I use:
Social bios: On Instagram, Twitter, and LinkedIn, my freebie is the very first thing people notice.
Email signature: Every email I send carries my signup link—it’s like a quiet growth engine.
Content upgrades: Inside blog posts, I’ll drop a bonus resource like, “Want the full checklist? Grab it here.” This alone has boosted my conversions by 20–30%, because it matches what readers want in that exact moment.
And trust me, there are endless places to slip in your signup link: pinned tweets, YouTube descriptions, podcast notes, Quora bios, Pinterest pins, free tools you build, thank-you pages, even WhatsApp group descriptions.
The rule I follow is simple: every touchpoint = signup opportunity.
💡 Pro tip: I don’t keep the same boring CTA forever. “Download my free guide” works at first, but it fades fast. Instead, I rotate hooks like “Steal my 7-step system” or “Grab the exact template I use daily.” This keeps it fresh and clickable.
Bottom line: if someone in your audience sees you, they should also see your signup link.
Step 6: Encourage Referrals
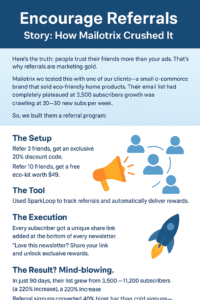
Here’s the truth: people trust their friends more than your ads. That’s why referrals are marketing gold.
At Mailotrix, we tested this with one of our clients—a small e-commerce brand that sold eco-friendly home products. Their email list had completely plateaued at 3,500 subscribers. Growth was crawling at 20–30 new subs per week.
So, we built them a referral program:
The Setup: We offered subscribers a super simple deal—“Refer 3 friends, get an exclusive 20% discount code. Refer 10 friends, get a free eco-kit worth $49.”
The Tool: We used SparkLoop to track referrals and automatically deliver rewards.
The Execution: Every subscriber got a unique share link added at the bottom of every newsletter:
“Love this newsletter? Share your link and unlock exclusive rewards.”
The Result? Mind-blowing. 🚀
In just 90 days, their list grew from 3,500 → 11,200 subscribers (a 220% increase).
Referral signups converted 40% higher than cold signups—because friends referred by friends came in already warm.
The client’s revenue jumped by $67,000 extra sales in that period, directly tracked back to these referred subs.
Here’s the kicker: that referral engine didn’t just bring in more subscribers—it brought in better subscribers. People who shared it were usually superfans, and the friends they referred were far more likely to stick around and buy.
That’s the real power of referrals. One happy subscriber turns into three. Three turn into nine. And before you know it, you’ve got viral growth on autopilot.
8. Build Email Subscribers Through Free Workshops and Demos
One of the best ways I’ve grown my email list is by hosting free workshops or demos. People love learning something valuable without paying, and if you provide real actionable insights, they’re more than happy to give their email in exchange.
Here’s how I do it:
Pick a specific topic – Don’t go broad. Instead of “Email Marketing Basics,” I’d choose something like “How to Write Subject Lines That Get Opened Every Time.” A focused topic makes it irresistible to the right audience.
Create a simple signup form – I use tools like Google Forms, Typeform, or my email marketing platform’s landing page. Only ask for name and email—less friction means more signups.
Promote everywhere – I share it on social media, in my email signature, blog, and even WhatsApp groups. Every touchpoint is an opportunity.
Deliver real value during the session – No hard selling. I focus on actionable tips that attendees can implement immediately. This builds trust and makes them excited to get more emails from me.
Follow up – After the workshop, I send a thank-you email with a recap, extra resources, and a gentle CTA to stay subscribed. This keeps engagement high and reinforces value.
💡 Why it works: Free workshops attract high-quality, engaged subscribers because they’re already interested in your topic. Plus, it positions you as an expert and builds credibility—subscribers are more likely to stick around and open your future emails.
9.Grow Your Email List by Adding Value in Comments
If you don’t have time to create content consistently, commenting on other people’s posts can still build visibility and grow your email list. Most marketers overlook this tactic, but it works surprisingly well.
For example, Ben Tossell, creator of Ben’s Bites—a daily AI newsletter—used this early on. He would reply to tweets about AI tools with a simple line like: “Shouting this out in tomorrow’s newsletter!” Nothing fancy, just consistent, valuable participation. When he replied to a tweet from Google’s CEO, his comment got nearly 26,000 views and hundreds of new subscribers.
You don’t have to copy Ben exactly. In my experience, commenting effectively works when you:
Clarify a point or add a useful stat – Make your comment immediately helpful.
Share a relevant link – Only if it genuinely adds value.
Drop a quick lesson or insight – Keep it short, actionable, and memorable.
The key is consistency. Pick a few influencers or creators your audience already follows and comment regularly. The goal isn’t to promote yourself overtly—it’s to add value. When people read your comment and think, “Who is this?”, that’s the start of awareness, and the first step toward them subscribing to your list.
💡 Pro tip: Over time, consistent value-driven comments make people curious about you and your work, turning casual readers into subscribers without a single direct pitch.
Step 10: Use Simple Chatbots or Interactive Forms to Capture Emails
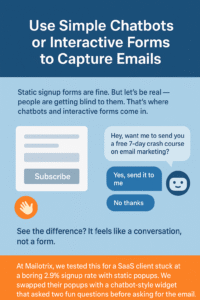
Static signup forms are fine. But let’s be real — people are getting blind to them. That’s where chatbots and interactive forms come in.
Instead of asking “Enter your email to subscribe,” imagine your site greets visitors with:
👋 “Hey, want me to send you a free 7-day crash course on email marketing?”
➡️ [Yes, send it to me]
➡️ [No thanks]
See the difference? It feels like a conversation, not a form.
At Mailotrix, we tested this for a SaaS client stuck at a boring 2.9% signup rate with static popups. We swapped their popups with a chatbot-style widget that asked two fun questions before asking for the email:
“What’s your #1 struggle with email marketing?” (options: growing list, writing emails, conversions)
Based on their answer, the bot offered a tailored lead magnet (template, guide, or checklist).
👉 End result? Their signup rate jumped from 2.9% → 9.4% in 30 days. That’s a 224% lift without spending a dollar more on traffic.
Why it works:
It feels personal. Users get content that matches their struggle.
It lowers resistance. People answer quick questions instead of staring at a cold form.
It qualifies leads. You already know what problem they want solved before emailing them.
If you want to stand out in 2025, replace at least one of your boring forms with an interactive chatbot. Tools like Tally, Typeform, or ConvertFlow make it drag-and-drop simple.
Step 11: Don’t Ignore Offline Email Collection
One thing I’ve learned is that email list building doesn’t have to stay 100% online. In fact, some of the warmest, most engaged leads I’ve ever seen came from offline interactions.
Think about it: you meet someone at an event, they scan a QR code, and boom—they’re on your list. That’s not cold traffic. That’s a real connection, and these people are far more likely to open and engage with your emails than a random visitor from Google.
For example, when we tested this strategy with a local fitness studio, we placed QR codes on posters, flyers, and even water bottles. Members scanned, signed up, and instantly got:
A free nutrition PDF
A weekly training tips newsletter
A 10% discount on their next class
The result? 1,200+ new local subscribers in 90 days, with open rates hitting 58%—way higher than what you normally see online.
But here’s the thing: this isn’t for everyone. If you run a local business (cafes, gyms, retail shops, workshops, events), QR codes are a goldmine. But if you’re running a global online business (like SaaS, digital agencies, or blogging), offline tactics won’t move the needle—you’re better off focusing on online funnels.
👉 My rule is simple: if you meet customers in person, don’t waste that touchpoint. Put a QR code on receipts, posters, or event slides and funnel that traffic straight into your list.
5. Light Advanced Tactics (Optional for Later)
Once you’ve nailed the basics, you can layer in some advanced moves. These aren’t must-dos right away — but they can accelerate growth when you’re ready.
Run a simple webinar or challenge.
For example: “5-Day List Building Challenge” or “Live Training: How to Double Your Conversions.” These work like magnets because people love events they can join.Test low-cost retargeting ads.
Once you’ve got traffic, drop $2–$5/day on Facebook or Google retargeting ads that push people back to your signup page. Since they already know you, the conversion rates are often way higher than cold ads.
👉 Pro Tip: Don’t touch these until you’ve got at least a few hundred visitors per week. Otherwise, your retargeting pool will be too small to matter.
Now That You’ve Built Your Email List… What’s Next?
By now, you know how to grow an email list. But remember what I said at the start—your list gets colder every year. People change jobs, switch emails, or simply lose interest. That’s why you can’t stop building; it has to be ongoing.
And here’s the truth: getting someone on your list is just the beginning. What really matters is what you do after they subscribe—that’s what decides if they’ll stay engaged or disappear.
Up next, I’ll share a few tips on what to do the moment someone joins your list, and how to keep your subscribers active, warm, and profitable over time.
Send a Warm Welcome Email
The very first thing you should do after someone joins your list is send them a welcome email. Think of it as a digital handshake—it sets the tone for your entire relationship.
Here’s a simple framework I use (and you can copy it today):
Thank them for joining – People like to feel acknowledged. A quick “Glad you’re here!” goes a long way.
Deliver what you promised – If they signed up for a free guide, checklist, or discount code, make sure it’s right there in the first email. Don’t make them hunt for it.
Introduce yourself – Share a short 2–3 line story about who you are and how you help. This builds trust.
Set expectations – Tell them how often you’ll email and what kind of value they can expect. Example: “I’ll send you one practical email marketing tip every Tuesday.”
Give a soft next step – Add a simple CTA like “Hit reply and tell me your biggest challenge” or “Follow me on Instagram for daily tips.” This starts engagement right away.
Automate Your Welcome Email
The best part? You don’t have to send it manually every time. You can set it up as an automated workflow in any email marketing tool:
Create a new automation – Most tools call it “Welcome Sequence” or “New Subscriber Automation.”
Trigger – Set it to send immediately when someone joins your list or downloads your lead magnet.
Add your email – Paste your welcome email content. You can even add a second or third email in the sequence for extra value.
Activate – Turn on the automation, and every new subscriber gets your email automatically.
💡 Pro tip: A 1–3 email welcome sequence works best. Start with your freebie, then follow up with a personal story or an extra tip. Automation saves you time and ensures every new subscriber feels welcomed without you doing a thing.
Focus on Compliance: GDPR & CAN-SPAM
Building your email list is only half the battle—staying compliant is just as important. Ignoring rules like GDPR (for Europe) or CAN-SPAM (for the U.S.) can lead to hefty fines and damage your brand’s reputation.
Here’s how I handle it:
Double Opt-In: Always ask subscribers to confirm their email. This ensures they genuinely want your emails and keeps you GDPR-safe.
Clear Consent: Make it obvious what they’re signing up for. Example: “Yes, send me weekly email marketing tips and free templates.”
Easy Unsubscribe: Every email must have a visible unsubscribe link. Make it one-click simple—don’t hide it.
Privacy Policy: Link to your privacy policy on all forms and landing pages. Explain how you store and use data.
Segment Non-EU Subscribers: For international campaigns, separate EU and non-EU subscribers if needed to ensure GDPR compliance.
💡 Pro tip: Even if most of your audience is outside Europe, GDPR sets a global standard. Following it builds trust, improves deliverability, and protects your business from legal headaches.
Segment and Clean Your Email List Regularly
Building your list is just the start. To keep it healthy and engaged, you need to segment and clean it regularly. I do this for every list I manage, and it makes a huge difference in open rates, clicks, and overall engagement.
Here’s how I do it in a simple, practical way:
1. Segment by Interest or Behavior
Not every subscriber wants the same content. You can segment based on:
Lead magnet they downloaded – People who grabbed a checklist might want more beginner tips, while those who grabbed an advanced template want deeper strategies.
Click activity – Send different content to people who actively click links vs. those who don’t.
Purchase history – If someone bought a product or service, give them more advanced tips or upsell offers.
Segmenting helps you send relevant content, which keeps subscribers opening emails instead of ignoring them.
2. Clean Your List Regularly
Every 3–6 months, I remove inactive subscribers or try to re-engage them. Here’s what works:
Send a re-engagement email: “We haven’t seen you in a while—do you still want my emails?”
If no response, move them to a separate list or unsubscribe them.
This keeps your main list fresh, improves deliverability, and ensures your open rates stay high.
💡 Quick tip: A smaller, active list is far more valuable than a huge, cold list. I’ve seen my email performance skyrocket after cleaning out 20–30% of inactive subscribers.
Make Every Email Mobile-Friendly
Most people check emails on their phones, so if your emails aren’t optimized for mobile, you’re losing clicks and engagement. I’ve learned this the hard way—an email that looks perfect on desktop can be a nightmare on mobile. Here’s how I make sure every email performs well:
Short subject lines: Keep it under 40 characters so it doesn’t get cut off in the inbox.
Single-column layout: Avoid multiple columns—they break on small screens.
Short paragraphs: 2–3 lines per paragraph max, so people don’t have to scroll forever.
Big, tappable buttons: Your CTAs should be easy to tap with a thumb.
Readable fonts: Minimum 14px for body text; headings should stand out but remain readable.
Images optimized for mobile: Compress them and use responsive design so they scale properly.
Test before sending: Always preview on desktop and phone to check spacing, links, and formatting.
💡 Pro tip: I try to read every email on my own phone before it goes out. If it feels cramped, confusing, or hard to click, I fix it. Small tweaks here make a huge difference in opens, clicks, and engagement.
Case Study: How Mailotrix Helped an E-Commerce Client Triple Their Email List
The Problem:
One of our e-commerce clients, a small brand selling eco-friendly home products, had stalled growth. Their email list hovered around 3,500 subscribers, adding only 20–30 new leads per week. Despite decent traffic, conversions were low, and the team had no clear system to capture and nurture emails.
What We Did:
Built a Referral Program: Every subscriber got a unique share link. Rewards included discounts for 3 referrals and free products for 10.
Optimized Landing Pages: We created dedicated signup pages for different lead magnets (checklists, guides, and templates) to reduce friction.
Promoted Everywhere: Signup links were added to social bios, email signatures, blog posts, and thank-you pages.
Followed Up Automatically: New subscribers received an automated welcome sequence delivering promised freebies and extra tips.
The Result:
Email list grew from 3,500 → 11,200 subscribers in 90 days (a 220% increase).
Referral signups converted 40% higher than cold traffic.
Revenue jumped by $67,000 directly linked to the new subscribers.
Engagement increased—subscribers opened and clicked emails far more than before.
Takeaway:
With the right combination of referrals, landing pages, and automated follow-ups, even a plateaued email list can experience massive growth in a short time, bringing in higher-quality, engaged subscribers.
Start Building Your Email List Today
At the end of the day, here’s the truth: your email list is the only traffic you truly own. Google can update its algorithm, Facebook can throttle reach, TikTok can disappear tomorrow—but that list of subscribers? That’s yours forever.
The biggest mistake we see? Waiting. Most creators and business owners think, “I’ll build my list later when I have more traffic.” Reality check: the earlier you start, the faster you grow.
👉 So here’s your challenge: pick just one step from this guide today. Add a signup form, create a simple checklist, or set up your first landing page. Don’t wait until tomorrow—momentum is built in small actions.
If you’re still unsure where to start, I recommend trying MailerLite (free up to 1,000 subscribers). It’s simple, beginner-friendly, and powerful enough to grow with you.
Remember:
📧 Every subscriber you capture today is a lead, a future customer, or even your biggest brand advocate tomorrow.
So go build that list. Your future business will thank you.
FAQs: Email List Building in 2025
How do I build an email list fast?
Speed comes from offers + visibility. Create a juicy lead magnet (checklist, template, or mini-course), then promote it everywhere: blog, socials, YouTube, and even your email signature. Pair it with a high-converting landing page and you can see 100–300 new subscribers in your first month if you already have traffic.
Can I build an email list without a website?
Yes. Use free tools like MailerLite, ConvertKit, or Mailchimp to create a hosted landing page. Share that link across your social bios, LinkedIn posts, YouTube videos, or even WhatsApp groups. Plenty of creators built their first 1,000+ subscribers without owning a domain. you can read full guide here.
Should I buy an email list?
Never. Bought lists are a spam trap. You’ll burn your sender reputation, get poor engagement, and in some cases, risk legal issues (GDPR/Can-Spam). Instead, spend that same money creating a strong lead magnet and promoting it. The ROI from organic growth beats any shortcut.
What’s the best free tool to start an email list?
If you’re starting from zero, MailerLite and ConvertKit Free are the easiest. They give you signup forms, landing pages, and basic automation — all without spending a dime until you grow past 1,000–2,000 subscribers.
How often should I email my list?
Consistency matters more than frequency. A good rule: once a week minimum so people don’t forget you, but not so much that you become spammy. In fact, industry data shows that brands emailing 1–2 times per week get the best balance of engagement and unsubscribes in 2025.

